 |
 |
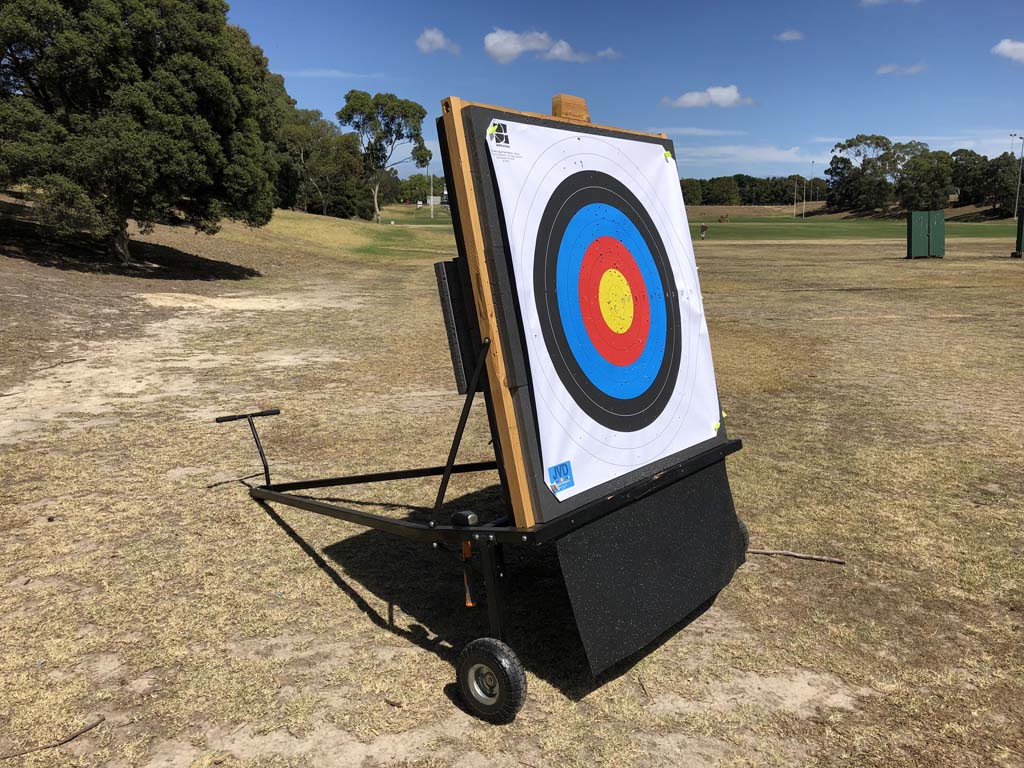
Box Hill City Archers now uses portable targets for shooting on. They are the end result of several iterations of portable target designs contributed by first Chris Wood, and then Matthew Webster.
Features
- Steel frame with two front legs and single rear anchor point
- Wooden facade protection on all archer-facing surfaces to protect arrows that impact the frame
- Rubber skirt to catch/slow arrows
- Puncture proof airless tyres
- Danage Domino 3HD/XHD target material held within a timber enclosure
- Single adult setup and teardown. No heavy lifting involved.
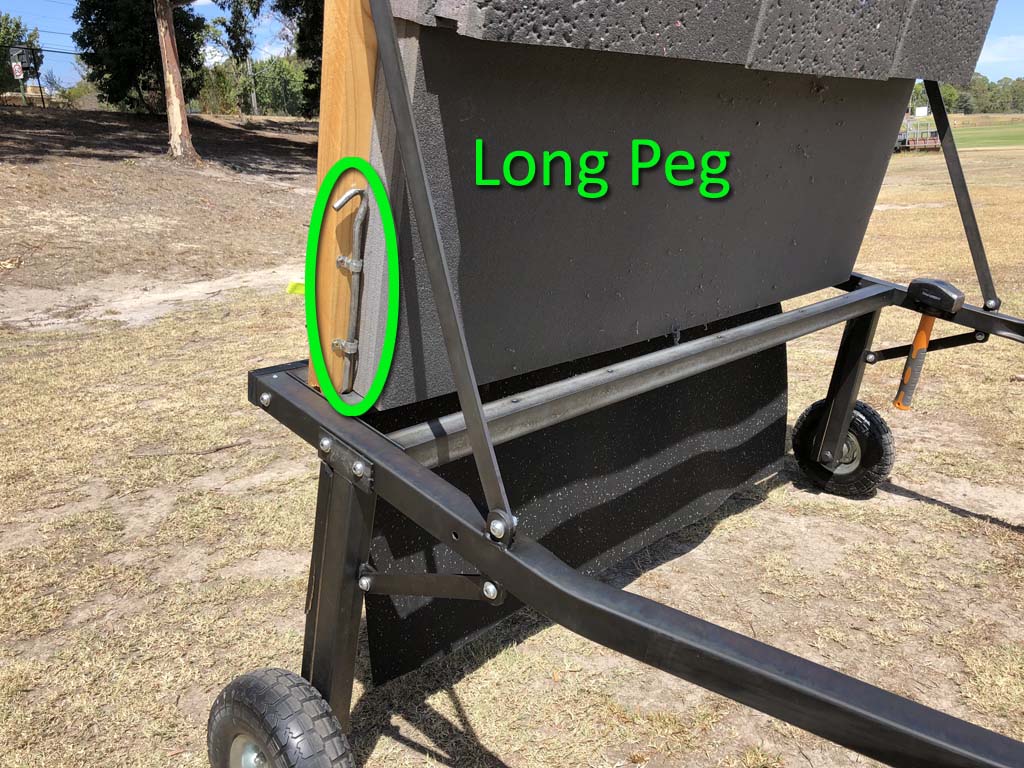
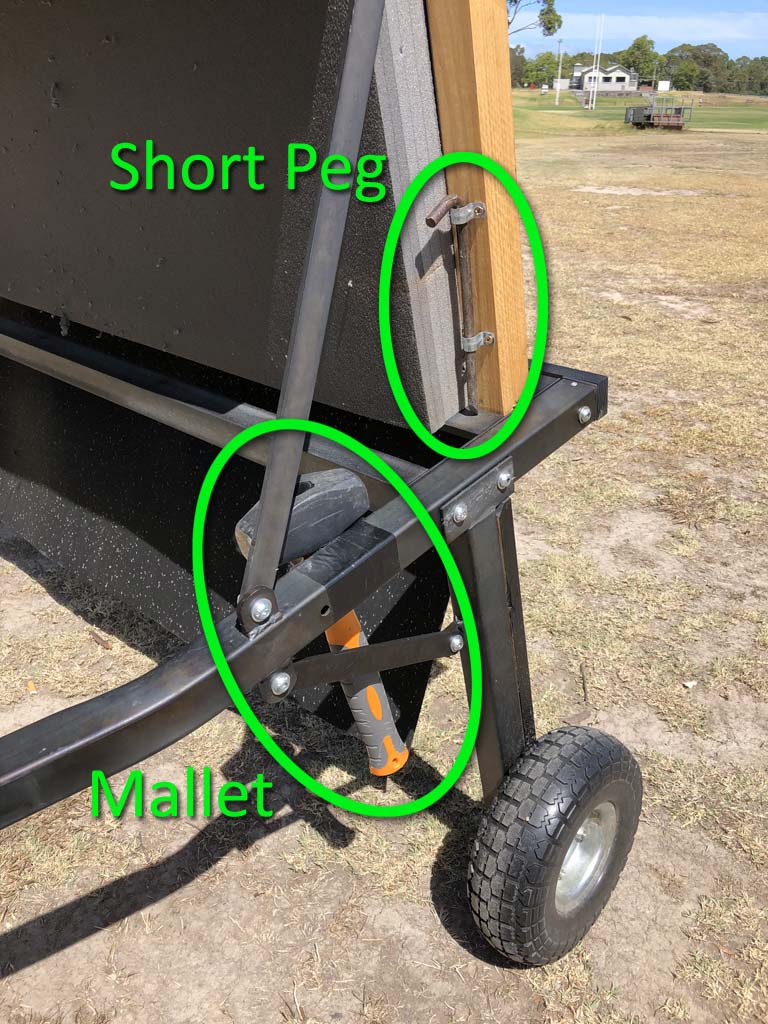
- Mounting points for long and short pegs, and a mallet.

Setup
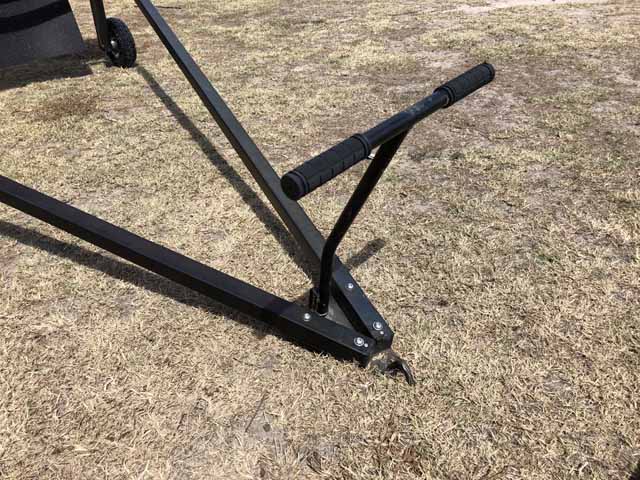
- Remove a target from the storage container by lifting the end by the handlebars, and pulling backward and rolling down the container ramp. Be careful to avoid the ramp-stop posts on either side of the container as indicated in the photo. When turning the target, steer it by moving to the target’s left and right. Do not attempt to twist the handlebars to turn the target.

- Carefully roll the target down the embankment onto the field, then across to the appropriate target distance line.
- Select the appropriate anchoring peg for the conditions. If the earth is soft, consider using the longer peg. If the earth is hard, use the shorter peg.


- Take the mallet and use it to strike the peg through the anchor hole and into the ground so that the target is anchored sturdily.

- Immediately stow the mallet back in its place on the target.


Teardown
- Remove the anchor by lifting the handlebars. Please exercise caution when lifting, as the anchor peg may be tightly lodged. For a tightly lodged peg:
- Plant your feet either side of the anchor peg and grip the handlebars.
- Keeping a straight back and using your legs to lift, perform short but repeated vertical jerks on the handle.
- Alternatively, take the other peg on the target, slide part of it underneath the anchor peg’s hook, and lever it against the ground.
- Place the peg back in its storage point.
- Wheel the target back to the storage container. When turning maneuvers are necessary, steer or turn the target by moving to its left or right. Do not try to steer the target by twisting the handlebars.
- Push the target up the ramp and into the shipping container. As with removing the target from the container, be careful to guide the target between the two ramp-stop posts.
- Steer the target to the left side of the container and push in until the target nests like a shopping trolley with the other targets that are already in there. As the target begins to nest, you will need to lower the handlebars so that the V part of the frame can fit beneath the handlebars of the target in front.
- Make sure that the target nests snugly against the one in front. We have a lot of targets and they must be packed in snugly for the container to close.
Maintenance
For maintenance information refer to this guide.